How to Make a Lease
This section covers making leases with Leasetool.
Before you Get Started
If you haven't added a property yet, see Add a Property or if you haven't added any rates to a property yet, see Adding Rates to a Property.
Getting Started
Select a property that has availability by either running a search or simply selecting a property.
Go to the "Rates" tab and click "Book" on any available time period (weekly or long term).
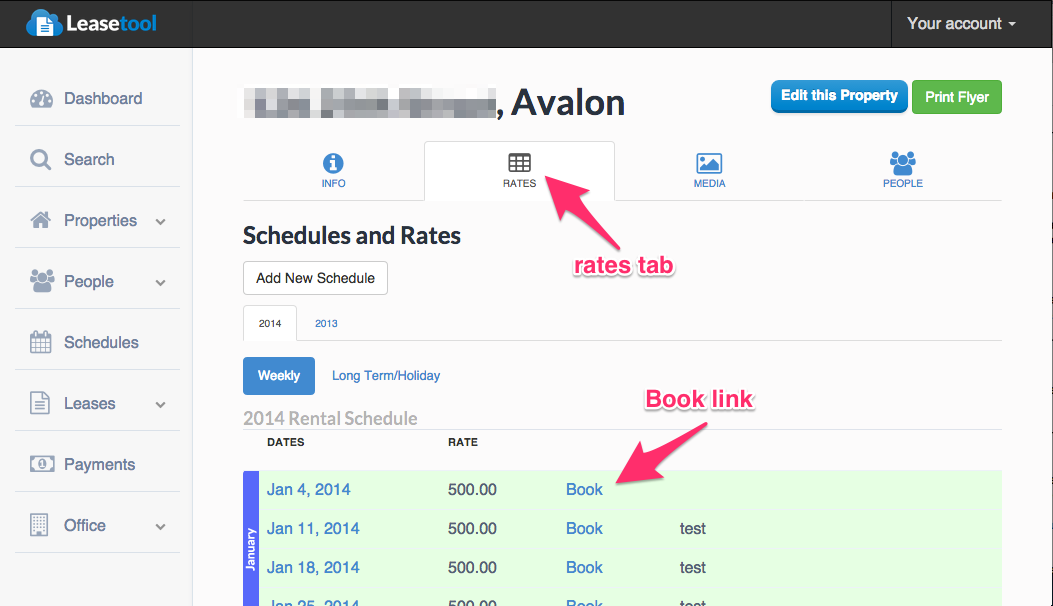
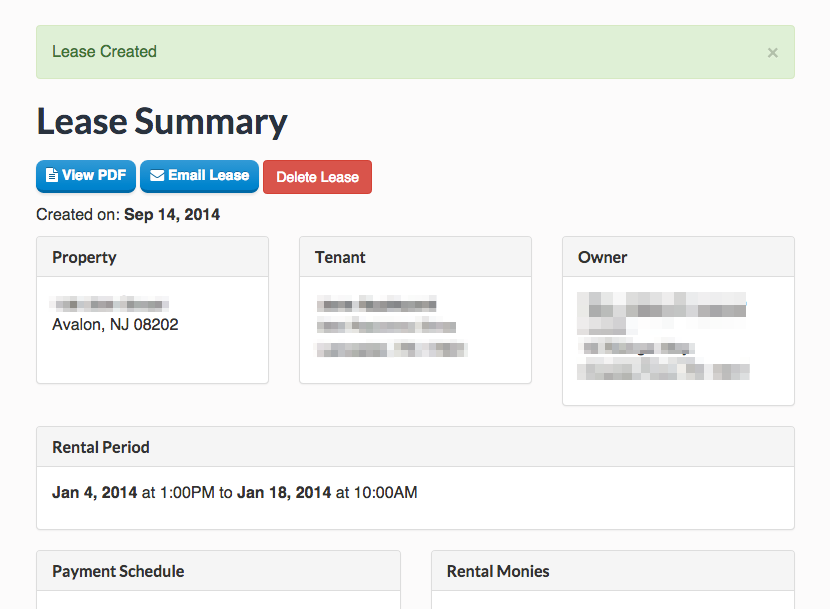
Once you click the "Book" link you'll go to the first lease creation screen.
Step 1
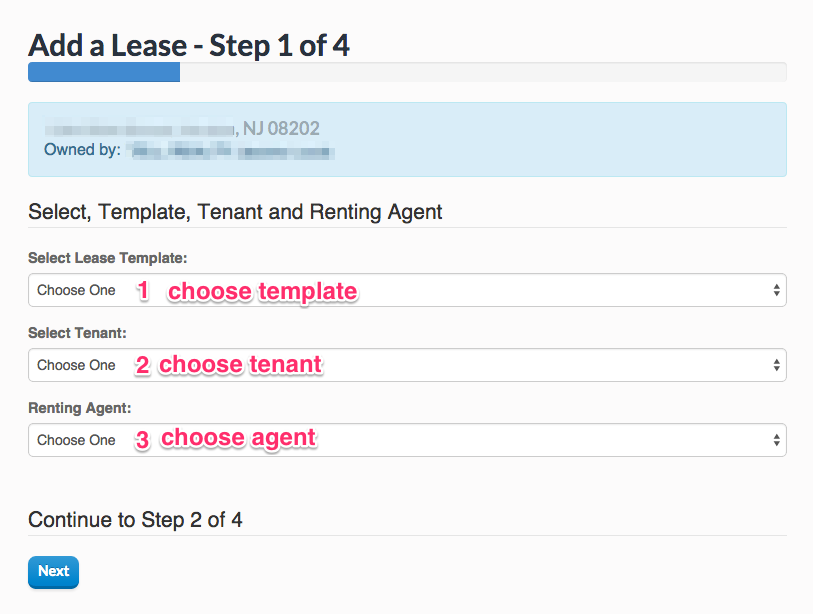
1. Choose a lease template. If you haven't edited your lease templates and clauses, see Editing Lease Templates.
By default use "Short Term" for weekly rentals and "Long Term" for seasonal/long term rentals.
2. Select a Tenant.
3. Select the Renting Agent.
Step 2
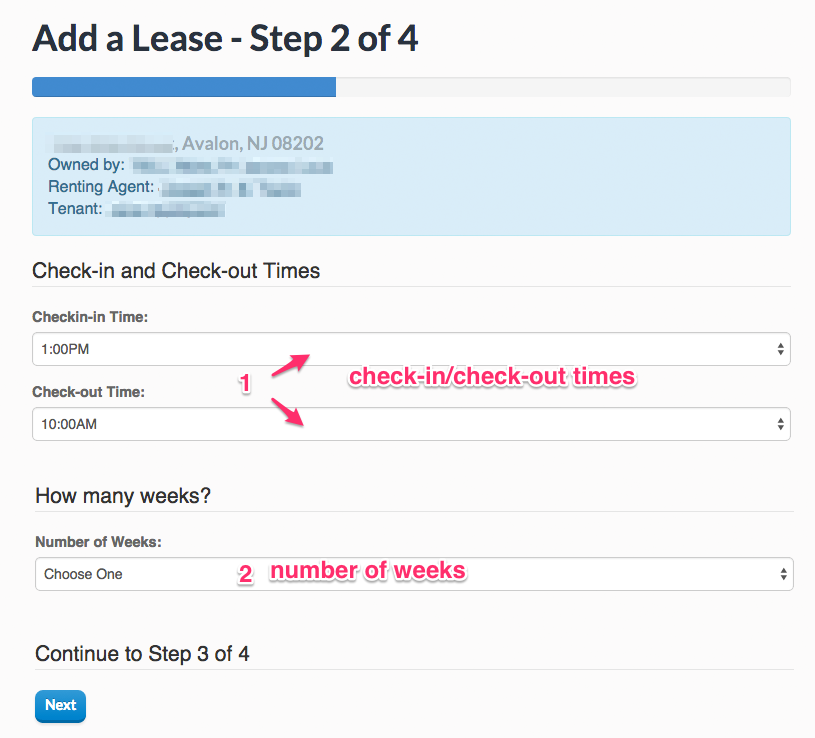
1. Select your check-in and check-out times.
2. If this is a weekly/short term rental, choose the number of weeks for the lease.
Step 3
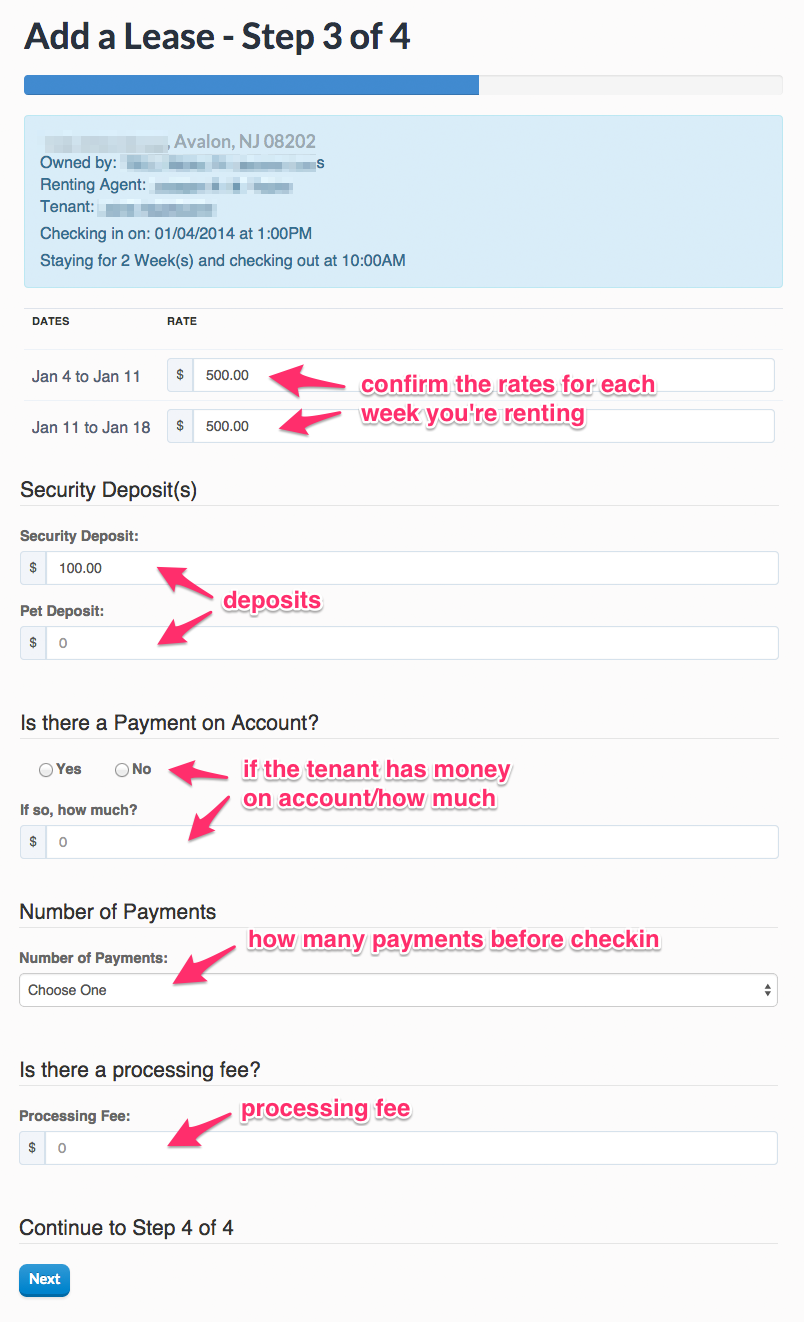
Confirm that the rate displayed is the rate being used for the lease. If you want to offer a discount you have a chance to change the rate here.
Select the security deposit for the rental and enter a pet deposit if one is required.
If the tenant has a payment on account already (e.g. if they're rolling their security deposit into a rental for the next season) check "Yes", and enter the amount.
Enter the number of payments you want to allow the tenant to pay before they check in.
Enter the processing fee is applicable.
Step 4
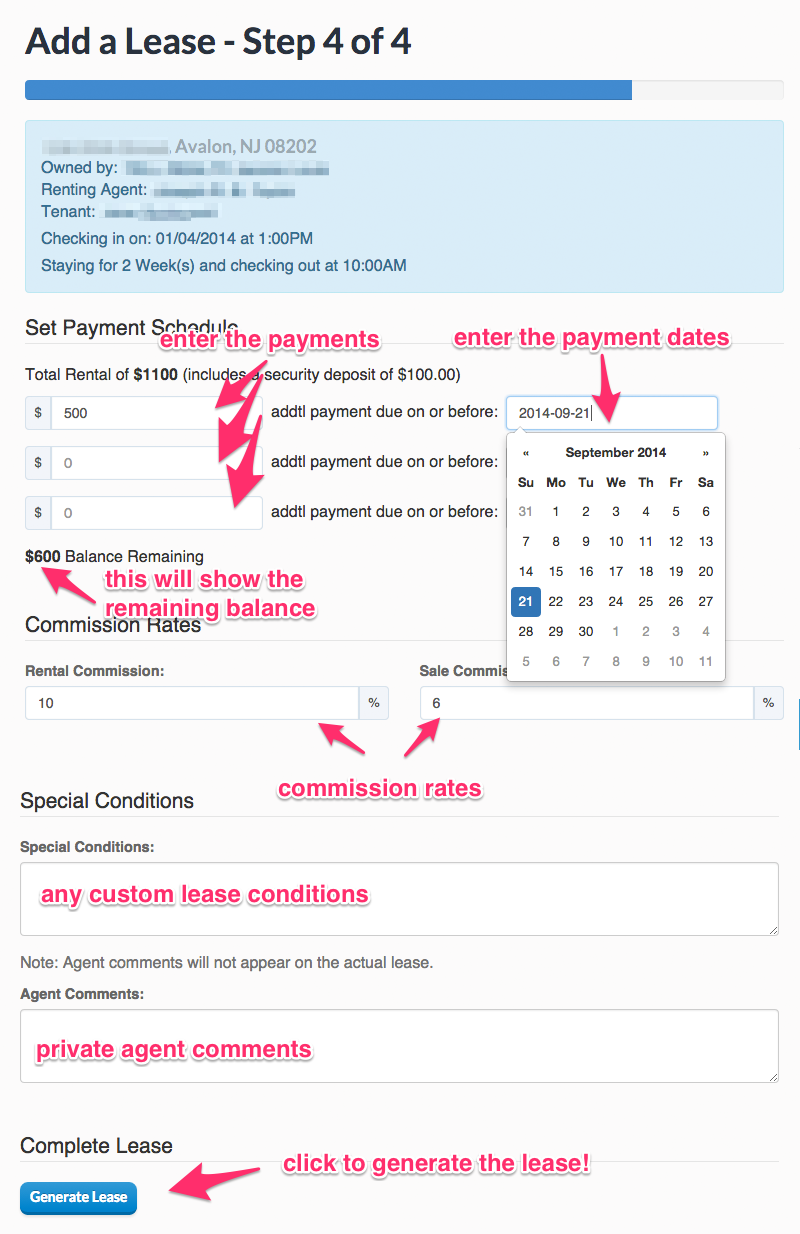
Enter the payment amounts and the date they are due.
Enter the commission rates.
Enter any special conditions that apply to this lease.